JavaPOS configuration tool is used to configure printer and cashdrawer component of BTP-2002NP etc. The functions are enabled via visiting and modifying
the XML File.
-Add many printers-Add many cashdrawer components (Each logical printer or cashdrawer must be configured with a LDN or Port No.);
-Delete logical device printer or cashdrawer;
-Configure the modified device port parameter;
-Do test if printer is connected and works normally.
JavaPOS software package installation includes this tool program.
In usr\java\jdk1.5.0\jre\lib\ext, you can select the configuration tool (ByConfigure.sh), and run it:
(1)In order to make user configure
device easily, a configuration tool is provides for
user to configure device by calling ByConfigure.sh file, and copy the content
produced in
the file into configuration file existed (jpos.xml) or use the file as your
configuration
file.
(2)If configure file doesn't be created
before installing SNBC JavaPOS software package.
under "jdk1.5.0" platform, users only need to copy "jpos.xml" file into the
directory
"jdk1.5.0\jre\lib\ext". Then "jpos111.jar" will orient in the file
automatically.
If it can't orient the file, firstly Pls uncompress jpos111.jar file. secondly
edit
"jpos.properties" file in the directory "jpos\res". Thirdly pls find and define
the
attributes of "jpos.config.populatorFile"
according to the below format:
jpos.config.populatorFile=D\:\\Program Files\\JavaPOS\\SetupPOS\\jpos.xml
(3)Pls note the "jpos.config.populatorFile" value need to be modified to your
own directory
plus file name.
Then please repackage using command below:
jar -cvf jpos111.jar jpos
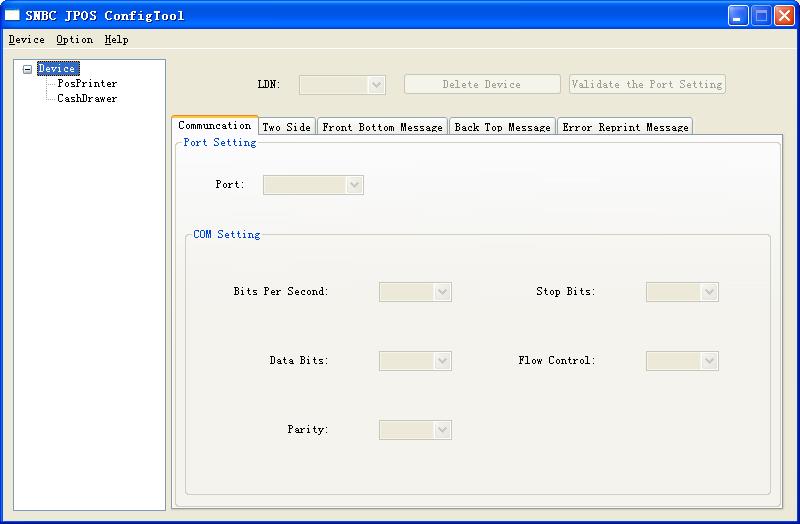
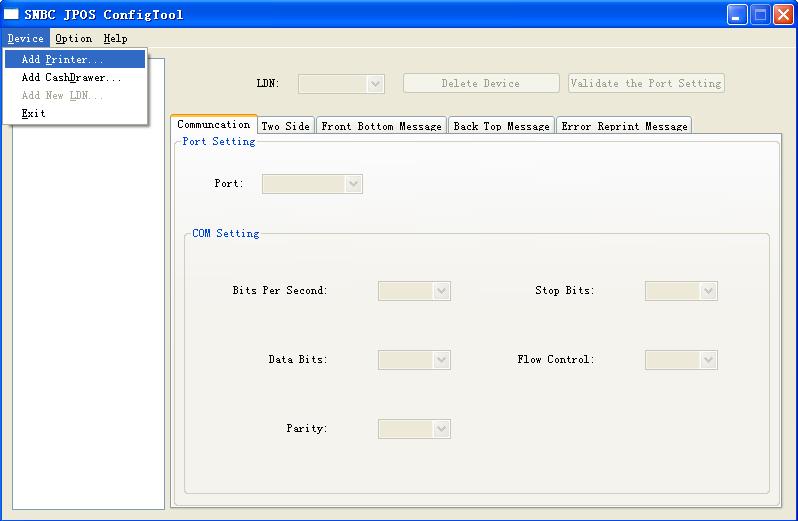
Step 1:Click "Device "; in main window menu, you can add printer component in the submenu shown as below:
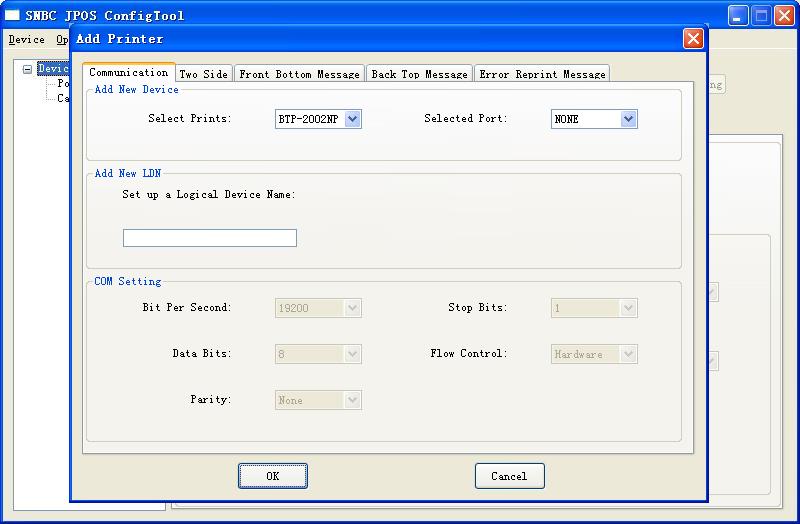
Step 2: Select "Add Printer... "and the window "Add new device "comes out. The added printer is selected first:
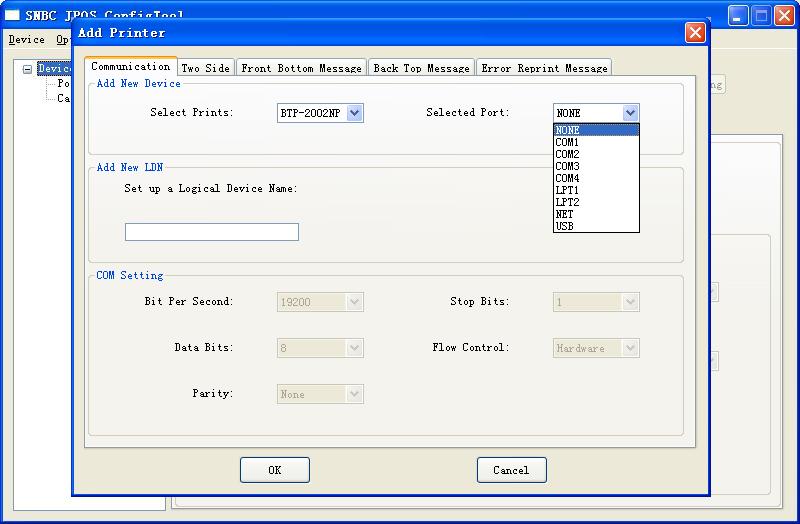
Step 3:Select the port. If the selected port is serial, please follow below steps; If you select USB port, you should skip to (Add printer components supporting USB):
Step 4:Add LDN:
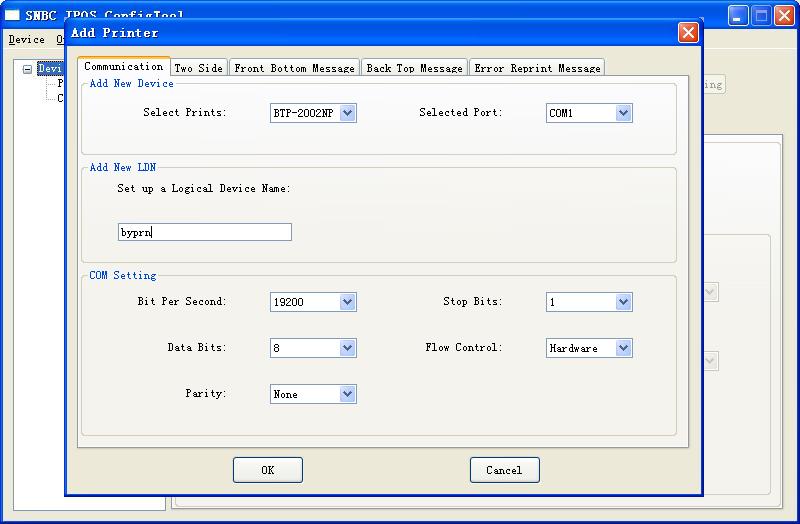
In this dialogue box, if the selected port is serial, its parameter can be set. The self-test page is printed to show the current printer serial parameter (Please refer to "Print self-test page ").
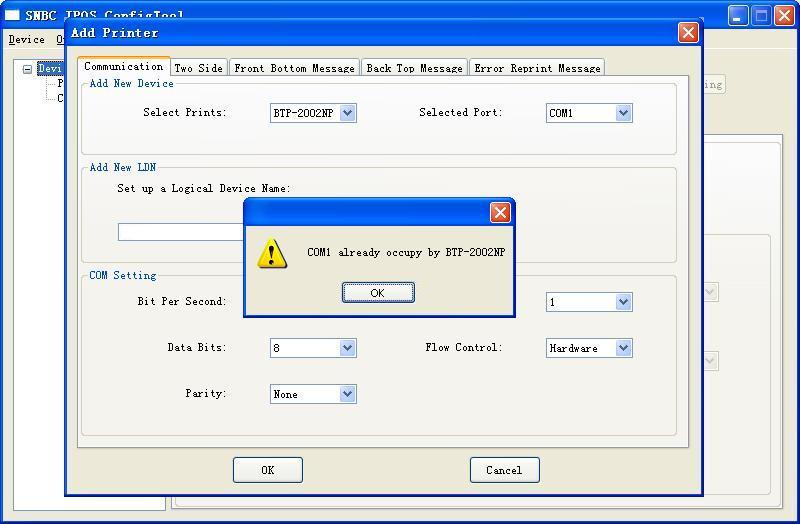
Note: Each printer has only one port No. and LDN, and a prompt shall be given for repeat add.
Then, you can configure the 2ST function.
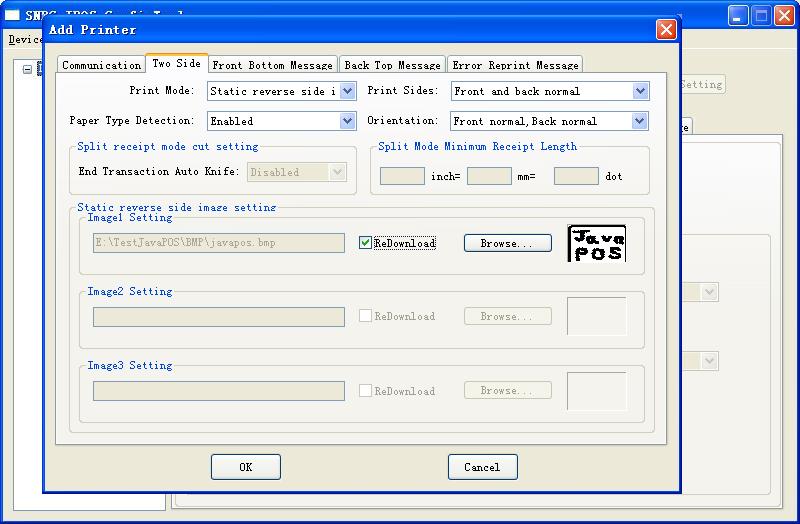
Step 1: Configure the 2ST main function, and you should check the "Two Side" page as below:

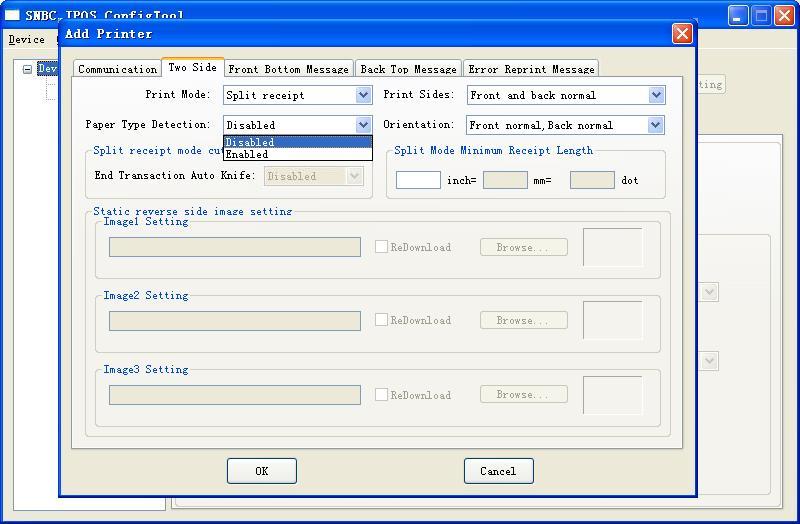
Step 2: You can select "Print Mode" as below:
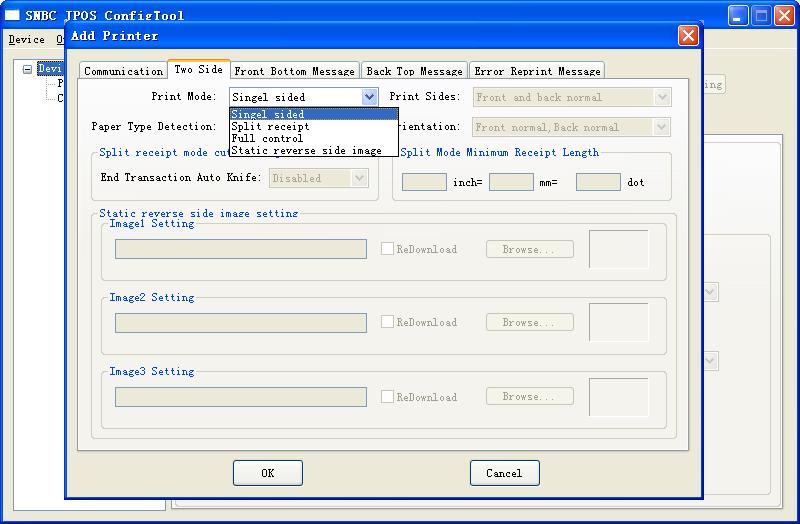
Note: four print modes:
The two-sided thermal print station has four modes of
operation:
1) Single Sided Mode :The printer only prints on the front side of the paper.
2) Double Sided Mode with Single Side Command (Split Receipt): Normal print
operations are buffered at the printer, executed and split between front and
back side when a knife cut is encountered.
3) Double Sided Mode with Double Side Command (Full Control): The side desired
to print on is selected, and the data to print are sent to it. After the data
for both sides are defined, a begin print, or knife cut command is issued to
print the two-sided receipt.
4) Double Sided Mode with Predefined Data (Static Reverse Image): Data to print
is sent to the printer. A predefined image is selected from previously-defined
images. When a print command or knife cut is received, the data is printed on
the front side, and the predefined image selected is printed on the back.
Single sided: default mode, When this setting is selected, the JavaPOS Service sets the printer to this mode at claim time. None of the other two-sided configuration options is processed. Any two-sided proprietary escape sequences are ignored, except for the escape sequence that switches modes. In this mode, the printer functions the same as all previous thermal receipt printers.
Once a two-sided mode is entered, the application can ONLY print using the JavaPOS transactionPrint method. The reason for this restriction is due to error-handling. Because the printer has to buffer all data before printing, there is no way to determine errors on a line level. Due to this buffering, errors can only be recovered at a transaction level. Therefore we enforce the use of transaction printing only while in a two-sided mode.
two-sided mode as below:
Split receipt: Double Sided Mode with Single Side Command, When this mode of operation is selected, the printer buffers all print commands sent to it until a paper cut command is issued. At that time, it splits the receipt and prints it between the front and back. All of the two-sided escape sequences and settings are valid except for those that deal with a predefined back side image, or selecting a specific print side.
Full control: Double Sided Mode with Double Side Command, This mode of operation is the one that gives the application the most flexibility in two-sided printing. It allows the application to define and print anything they want on both sides of the paper dynamically. See Select Print Side Sequences under Data Characters and Escape Sequences for special ESC sequence only available in this mode.
Static reverse side image: Double Sided Mode with Predefined Data, As with all of the TST2SideMode settings, this mode is initiated at claim time, or with the select mode escape sequence. At claim time, the Service Object loads the predefined image file from the configuration setting of "Image 1 Setting" and enables the two-sided mode. If this mode is selected but the TSTPreDefinedImage1 is not populated, then it will remain the default image in the printer. All of the two-sided escape sequences are valid for this mode of operation except for the "Select Print Side" sequence. The ESC[2ST;3;n!v[directory / filename] activates the predefined back side image and can be used to change the image that is being used for the back side of the paper. If this sequence is sent with n = 0 but no [directory / filename] parameter, it is assumed that the user wants to erase the existing predefined image and clears it. The above sequence is ONLY VALID after a knife cut, and before any other print operation is sent to the printer. If any other print operation is sent to the printer before this sequence, then it is ignored. See Data Characters and Escape Sequences for more information about escape sequences that control the two-sided functionality. Now this mode can only select one image.
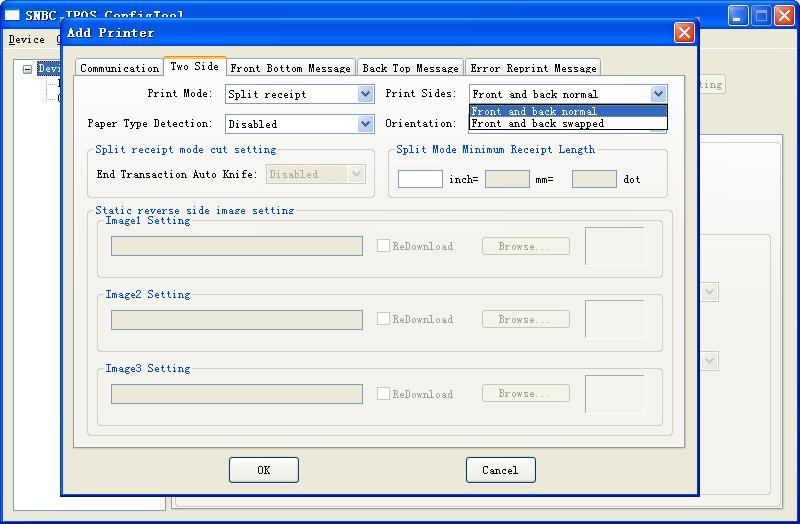
Step 3: If you select 2ST mode (such as "Split receipt", "Full control" and "Static reverse side image"), you can select "Print Sides", "Paper Type Detection" and "Orientation" function:
Step 4: Print Sides setting:
Front and back normal: Front side faces toward front of the printer.
Front and back swapped: Front side faces away from the front of the printer.
Step 5: Paper Type Detection setting:
Disabled: don't check if you use a 2ST paper.
Enabled: check if you use a 2ST paper, when you don't use a 2ST paper, then the StatusUpdateEvent will be fired with the 10033 status code. IF you change to a 2ST paper, then the StatusUpdateEvent will be fired with the 10034 status code.
Step 6: Orientation:
Front normal, Back normal: Default orientation.
Front normal, Back upside down: The back side will reverse 180 degree.
Front upside down, Back normal: The front side will reverse 180 degree.
Front upside down, Back upside down: The front side and back side will reverse 180 degree all.

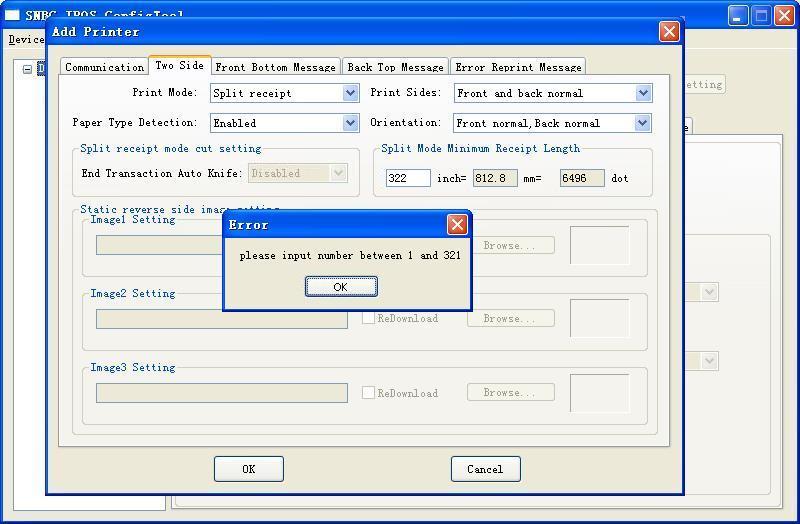
Step 7: If you select "Split receipt" mode, then you can set "Split Mode Minimum Receipt Length". If you don't set, it will split the 2ST receipt default. If you set, the length of front side of the 2ST receipt will be the same with your setting.
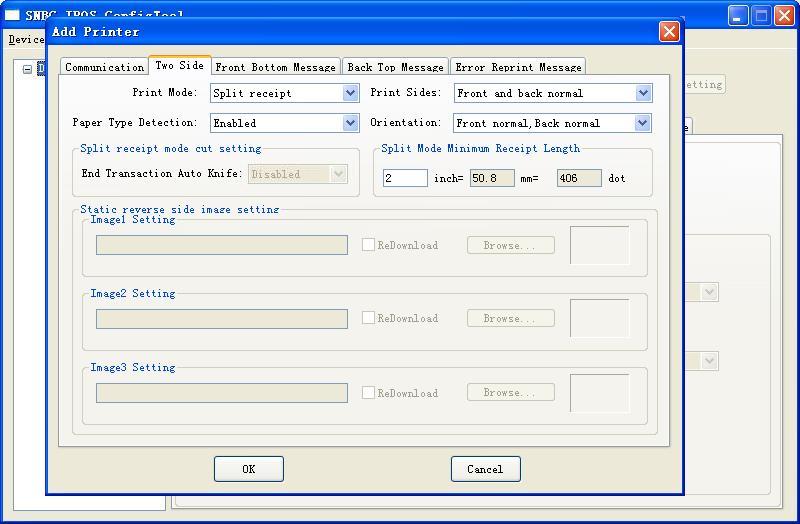
Note: The maximum of the length is 321 inch.
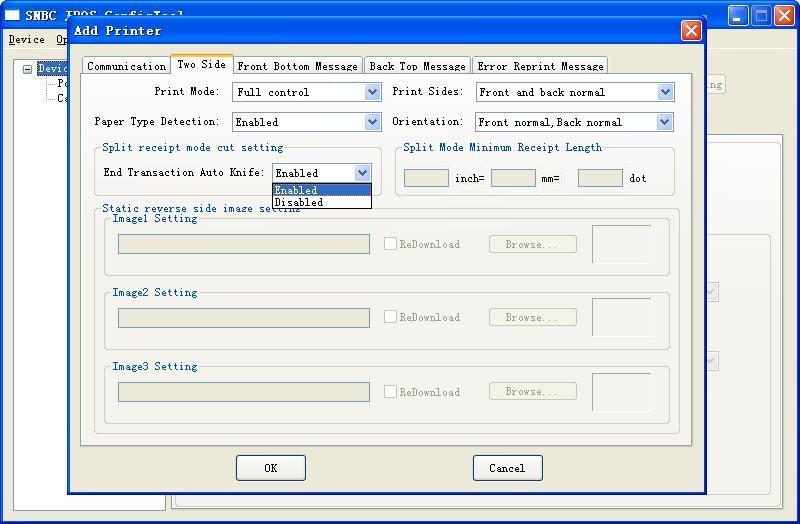
Step 8: Auto Cut Setting
If you select "Full control" mode, then you can set "Auto Cut Setting".
Enabled: JavaPOS Service Object issues a knife cut when the TransactionPrint method is called with a control parameter of PTR_TP_NORMAL .
Disabled: No cut is performed when TransactionPrint method is called with a control parameter of PTR_TP_NORMAL .
Step 9: Image 1 Setting Redownload
The JavaPOS Service downloads a image to FLASH at Claim time if you set the "Image 1 Setting Redownload" enabled,in order to protect FLASH, the the JavaPOS Service will set the "Image 1 Setting Redownload" disabled automatic, and next time the JavaPOS Service won't redownload the same image.
When you select Disabled, and it won't download any image to FLASH except for ESC[2ST;3;n!v[directory / filename] Data Characters and Escape Sequences.

You can click the "Browse..." Button the select the image which you want to download, when you select a image you wanted, the Picture Box will show this image, and the static label will show the directory of the image.
Step 10: Configure the 2ST predefined Bottom Front message function, and you should check the "Front Bottom" page as below:
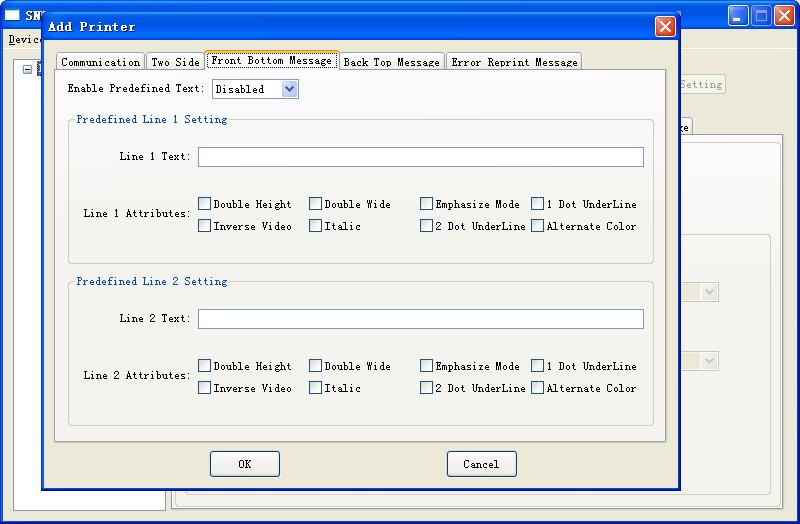
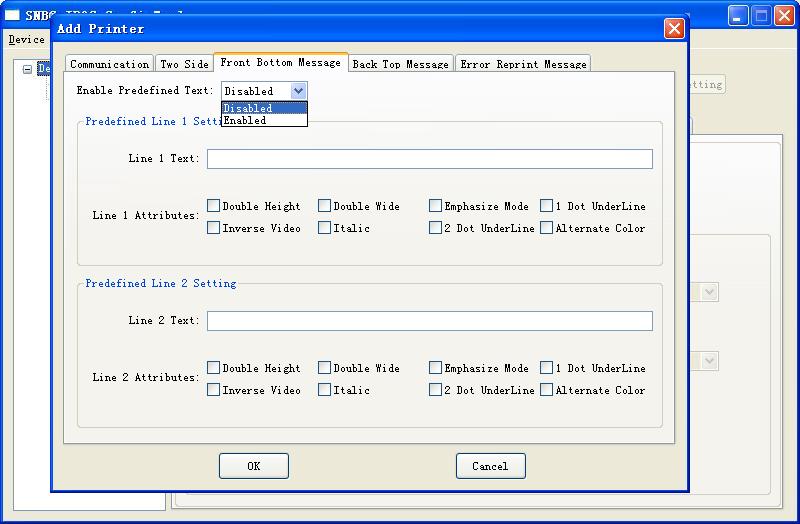
Step 11: Enable Predefined Bottom Front message:
Disabled: the Bottom Front message will be forbid.
Enabled: the Bottom Front message will be fired.
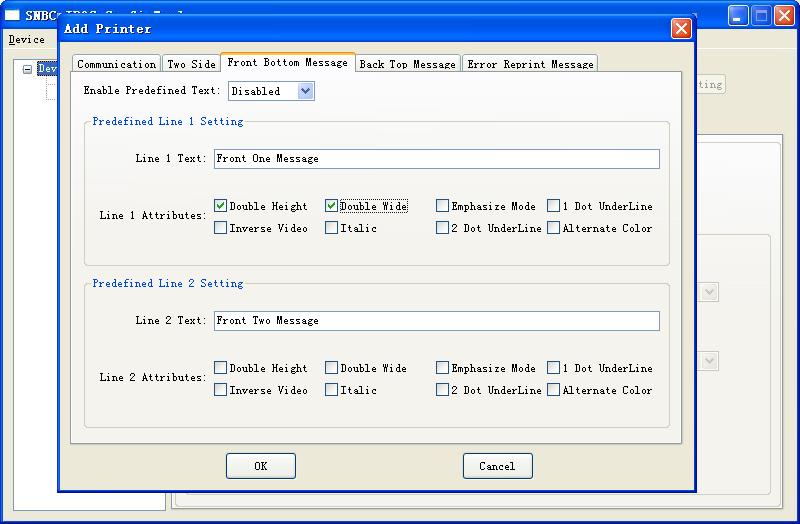
Step 12: If you enable Predefined Bottom Front message, you can set the Bottom Front Lion one message and Bottom Front Lion two message text Attribute. For example, you can set the Bottom Front Lion one message text double height and double wide, and set the Bottom Front Lion two message text normal:
Step 13: Configure the 2ST predefined Top Back message function, and you should check the "Back Top" page as below:
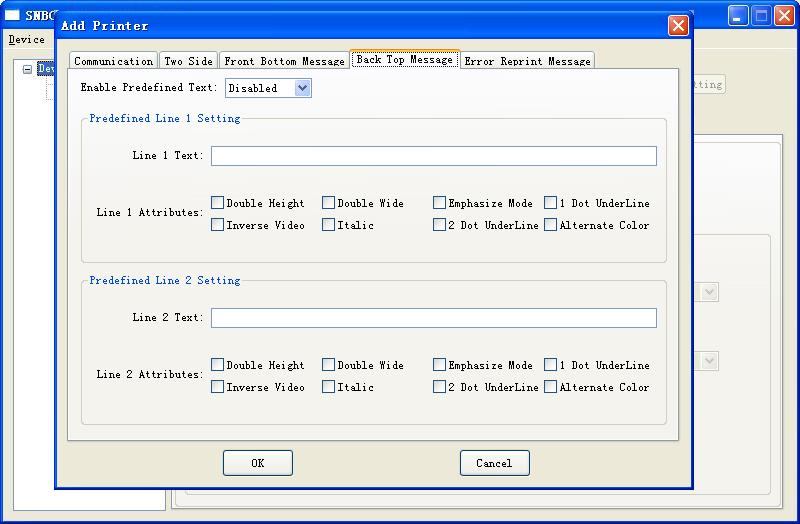
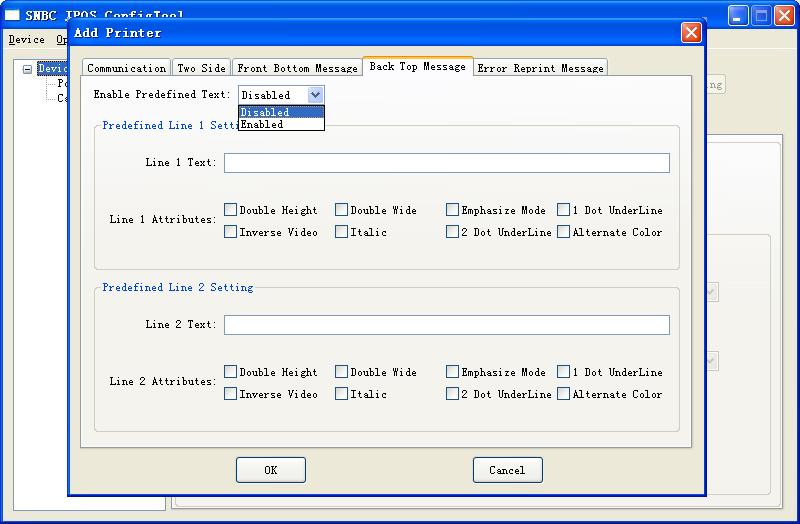
Step 14: Enable Predefined Top Back message:
Disabled: the Top Back message will be forbid.
Enabled: the Top Back message will be fired.
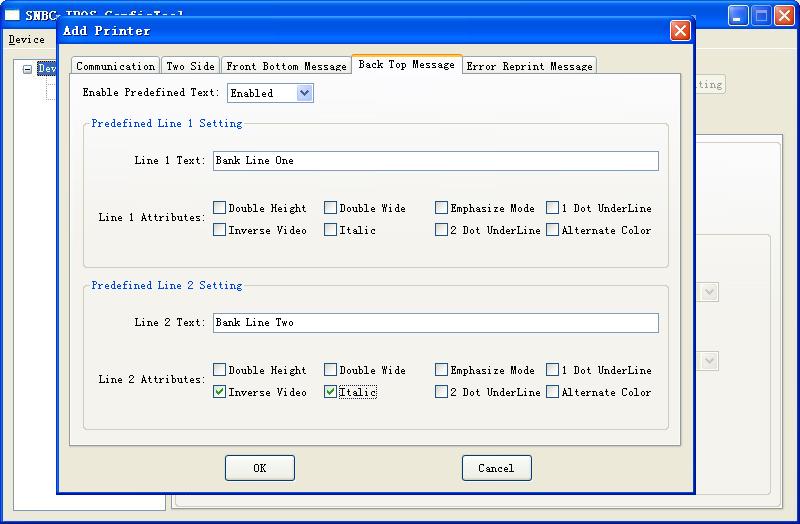
Step 15: If you enable Predefined Top Back message, you can set the Top Back Lion one message and Top Back Lion two message text Attribute, for example, you can set the Top Back Lion one message text Emphasize Mode and 1 Dot UnderLine, and set the Top Back Lion two message text Inverse Video and Italic:
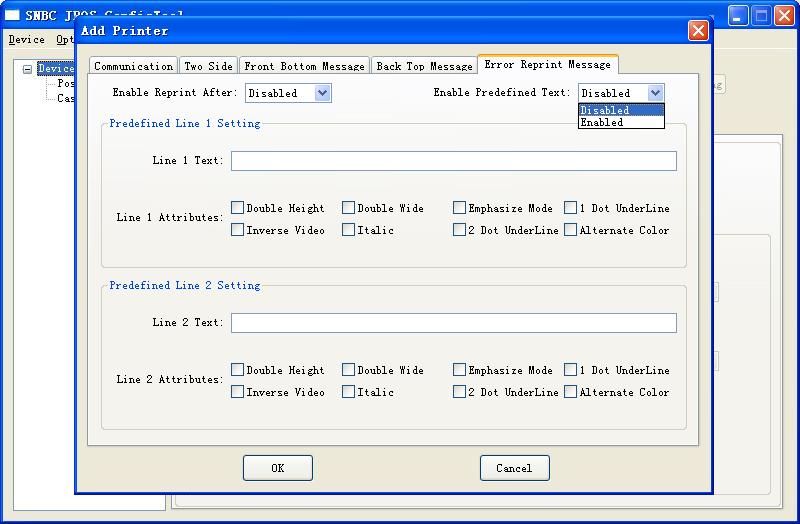
Step 16: Configure the 2ST predefined Error Reprint message function, and you should check the "Error Reprint" page as below:
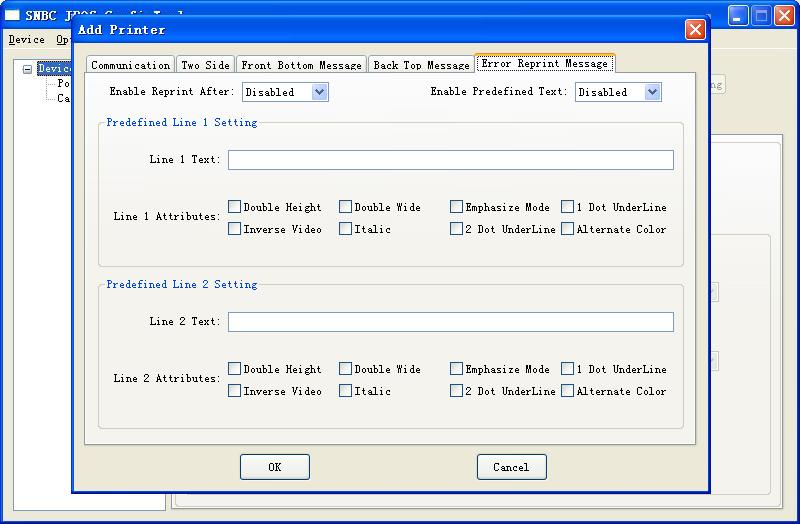
Step 17: Enable Reprint after error:
Disabled: the JavaPOS Service can't reprint the previous error receipt.
Enabled: the JavaPOS Service reprint the previous error receipt.

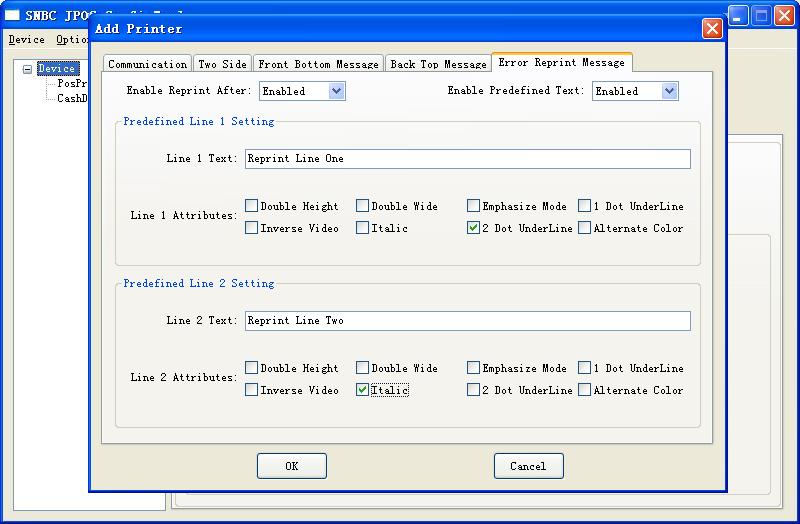
Step 18: Enable Predefined Error Reprint message:
Disabled: the Error Reprint message will be forbid.
Enabled: the Error Reprint message will be fired.
Step 19: If you enable Predefined Error Reprint message, you can set the Error Reprint Lion one message and Error Reprint Lion two message text Attribute. For example, you can set the Top Error Reprint one message text 2 Dot UnderLine, and set the Top Back Lion two message text Italic.
Step 1 and step 2 is same as that of printer components supporting serial or parallel, the skip to (Add printer component supporting serial or parallel).
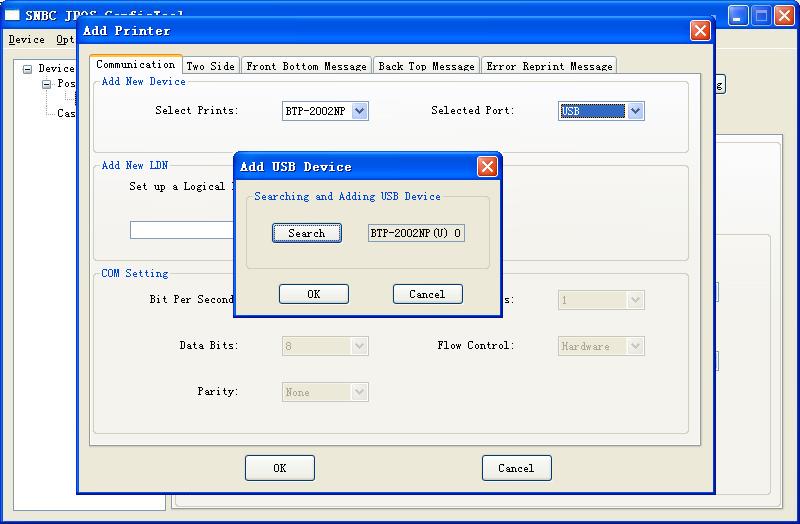
Step 3: USB port shall be selected, and open the dialogue box for adding USB device shown as below:
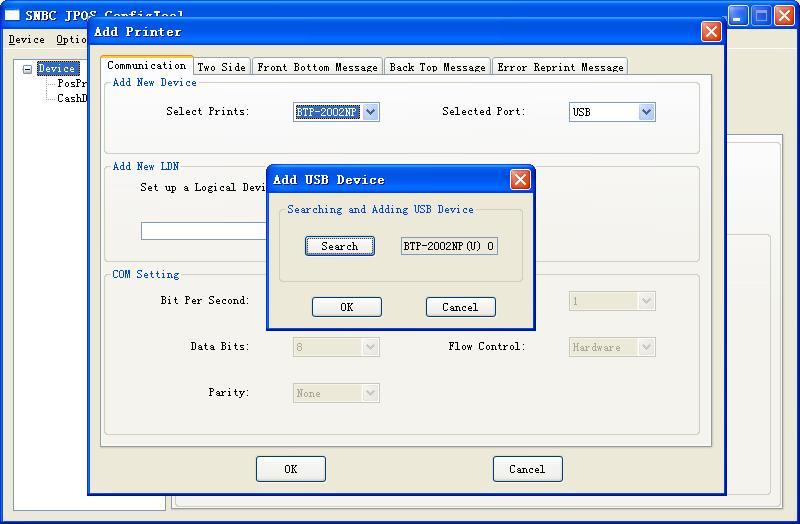
Step 4: Click "Search "button and find USB-Port printer name to be added.
Step 5: After the search is finished, click "OK "button.
Step 6: Add LDN and click "OK "; to finish the add of USB-Port printer LDN.
There is a folder named USBPrinterIDSet V1.0 in the BYJavaPOS_Linux V*.**.tar. Run USBPrinterIDSet V1.0 to read and write the port.
Then you can use the configuration tool (ByConfigure.sh) add the two different ID USB Printers, and you must power on and configure them one by one as below:
(add the first USB Printer, you must Power off the second USB Printer)

(add the second USB Printer, you must Power off the first USB Printer)
Then, you finish adding two different ID USB Printers.
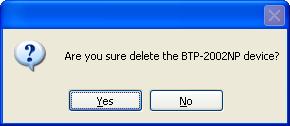
Step 1:Select the printer or cashdrawer to be deleted in the left tree controls of main window, and then click the selected object and the selected device parameter is shown at the right.
Step 2: Click "Delete Device " button, and then a delete prompt shall comes out. You can click "Confirm " button to finish the deletion of selected printer or cashdrawer.
Note:
1.In the deletion of printer, if the deleted printer has related cashdrawer, this cashdrawer shall be deleted together.
2.LDN cannot be edited or modified in main window menu.
3.If device has more than one LDN, a delete prompt shall comes out., click "OK" to delete the device, or click "cancel" to delete the current LDN.
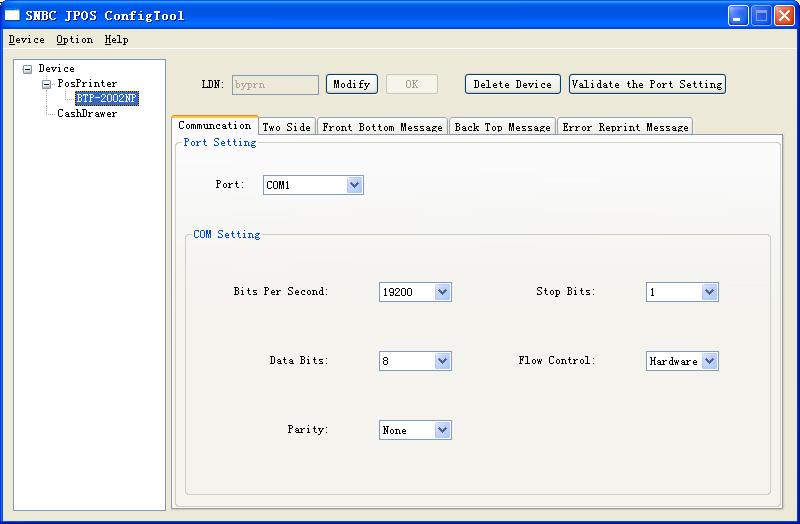
Step 1:The printer with a port to be changed shall be selected in the left tree controls of main window menu.
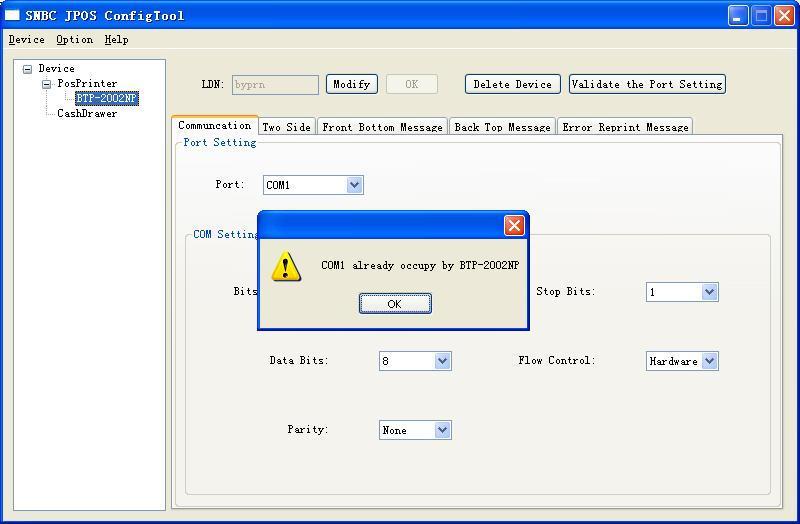
Step 2:You can select the port to be changed in the submenu of main window "Port ". If other printer has occupied this port, a prompt of the used port is given as below.
Step 3:If the port to be changed is serial, you also can change the serial configuration parameter. After ending the change, click "Validate the Port Setting " button to effect it and a finish prompt shall be given.
Note: The print port to be changed is only serial or parallel, however USB-Port printer cannot be modified.
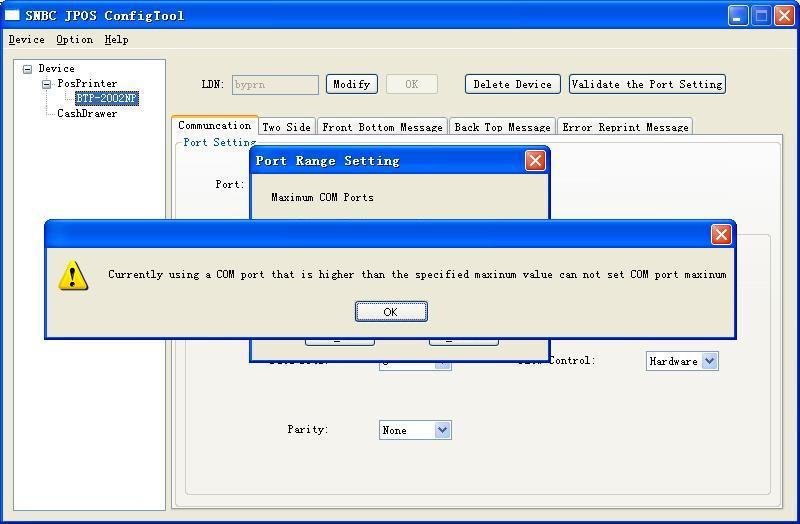
Step 1:Click "Option " button in main window menu, then a submenu pop-up. Click " Port Range Setting... ",then a dialogue box of the setting serial and parallel number shall pop-up as below :
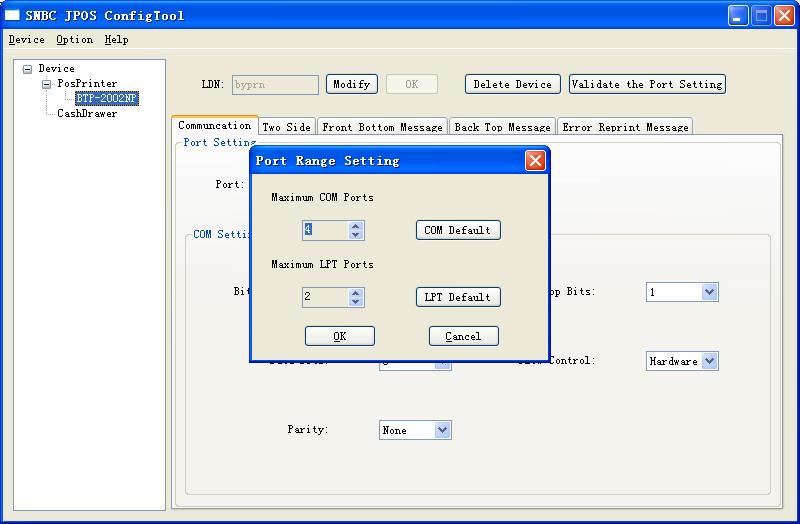
Step 2:Input or click the right up and down arrow in edition box to set the required serial or parallel number.
Step 3:Click "OK "; button. If the number inputted in the edition box is less than Max. port value of the corresponding printers added, a prompt shall be given shown as below; otherwise, you should make the settings according to the inputted port number, and exit the dialogue box after its success.
Note:
Click "COM Default " button, then
the serial recover is defaulted as 4.
Click "LPT Default " button, then the parallel
recover is defaulted as 2.
In installation path of BYJavaPOS you can select uninstall JavaPOS software (Change BYJavaPOS Installation), and click "Uninstall Product" to start the uninstall according to the prompt.